A pocket lab for real measurements.
Plug in a sensor pod. The reading appears on the Hepek's screen and, over Wi-Fi, live on a laptop or phone. We design and build it for classrooms.
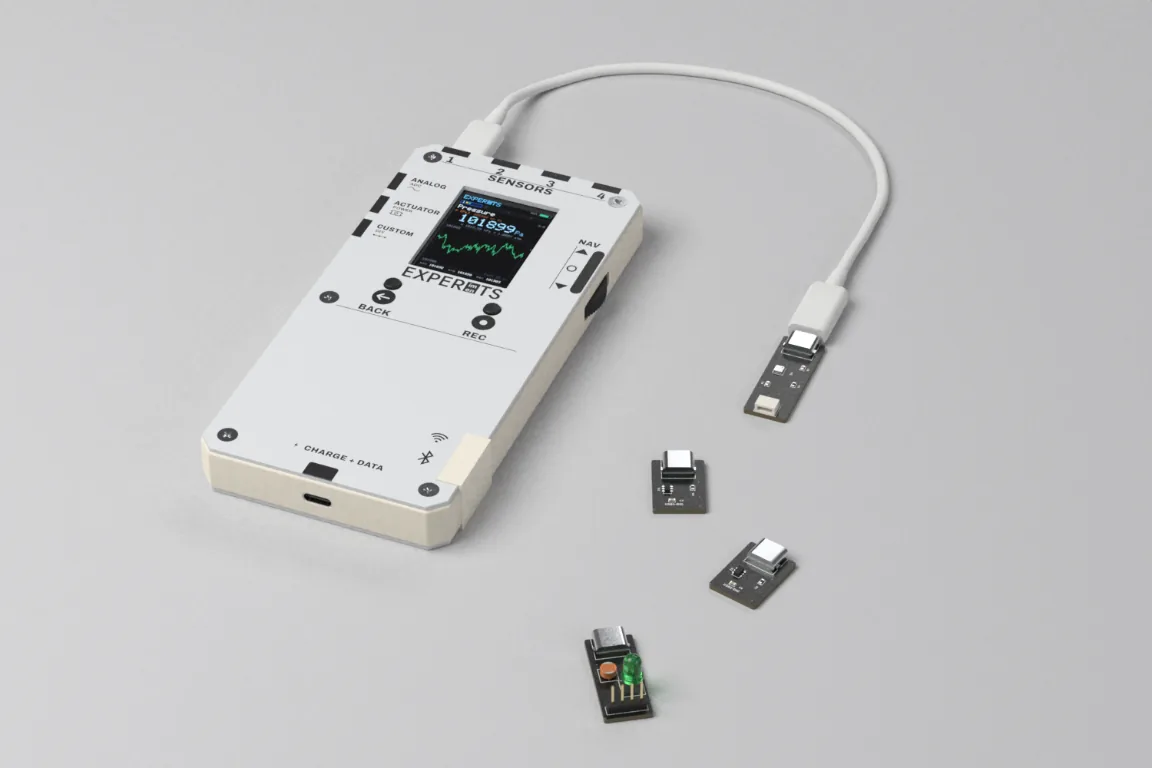
- 4sensor ports, hot-plug
- 9pods to plug in
- 50/sfastest pods
- 3ways in: USB, Wi-Fi, REC
Plug in. Watch it stream.
Each pod reads at its own rate and is tagged with its port. Over Wi-Fi, every screen watching sees the same data.
Tap a pod to plug it in
Plug a pod into the Hepek to start.
Three steps. No setup.
Pods connect with a standard USB-C cable. The Hepek recognises each one as it goes in.
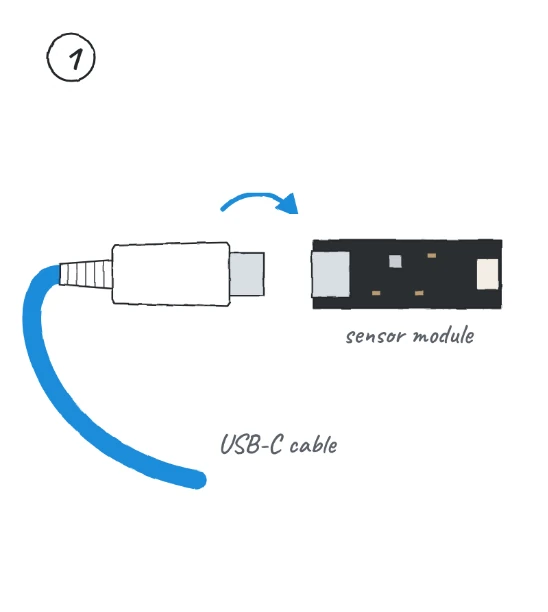
Plug the USB-C cable into the pod.
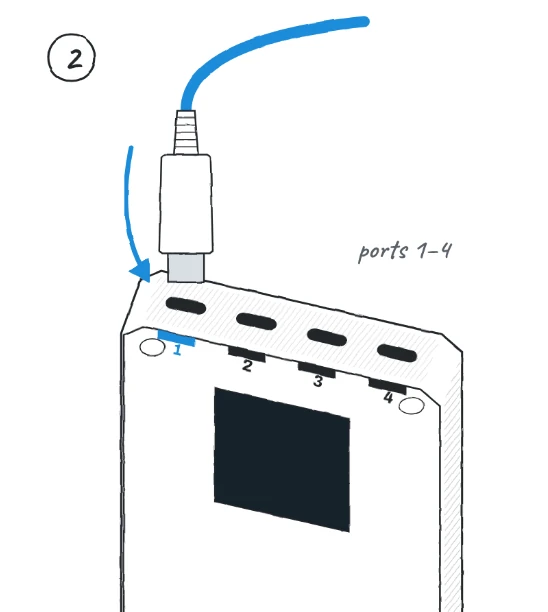
Plug the other end into a sensor port, 1 to 4.
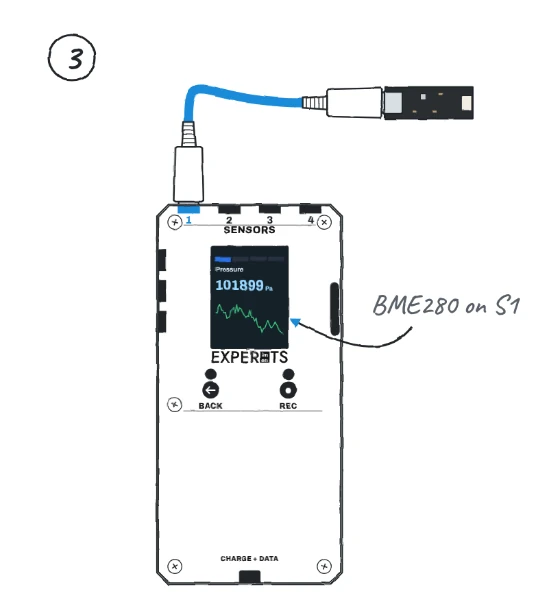
The reading appears on screen, tagged with its port: S1.
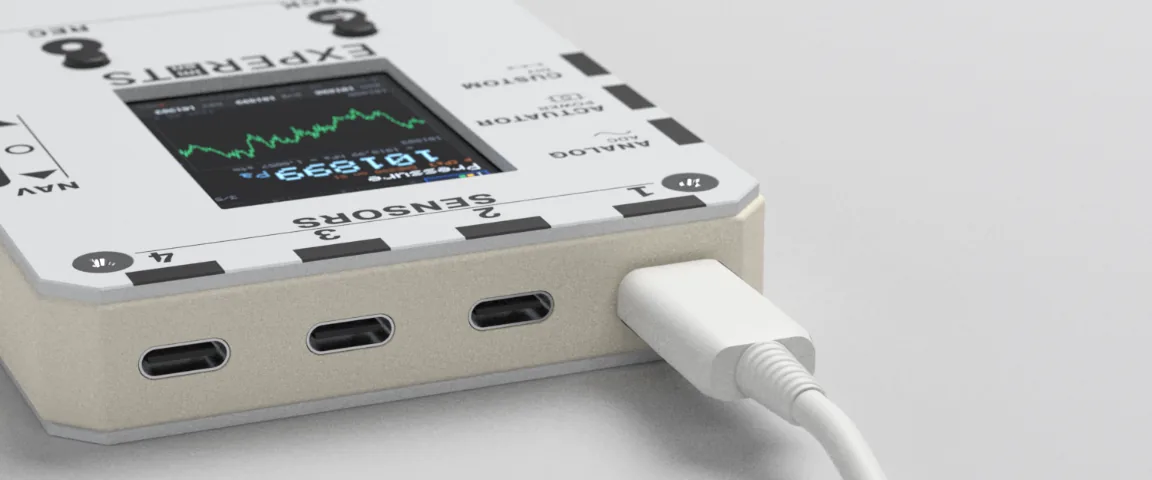
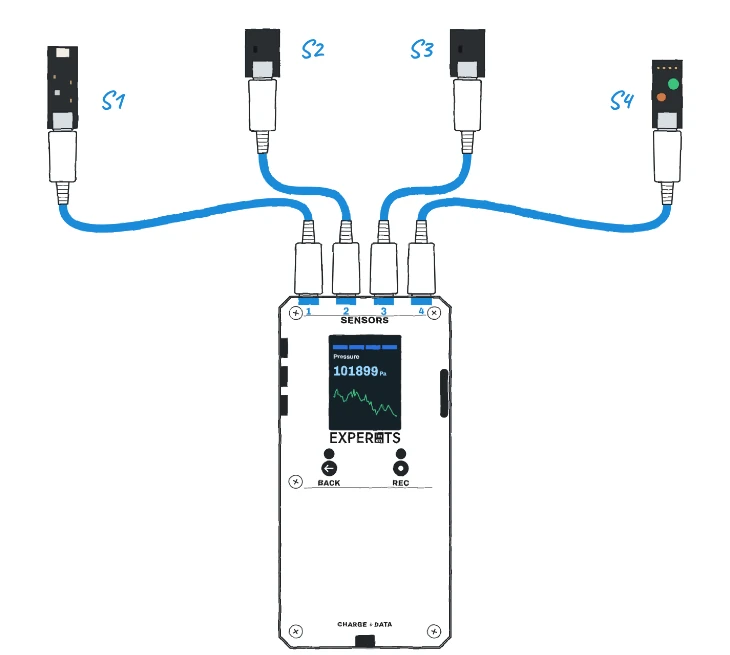
Up to four at once.
One pod per port, each with its own tab on the Hepek's screen.
- Digital pods fit any of S1–S4.
- Two of a kind? Use two ports.
- Side pods, such as the voltage probe, use the ports on the left.
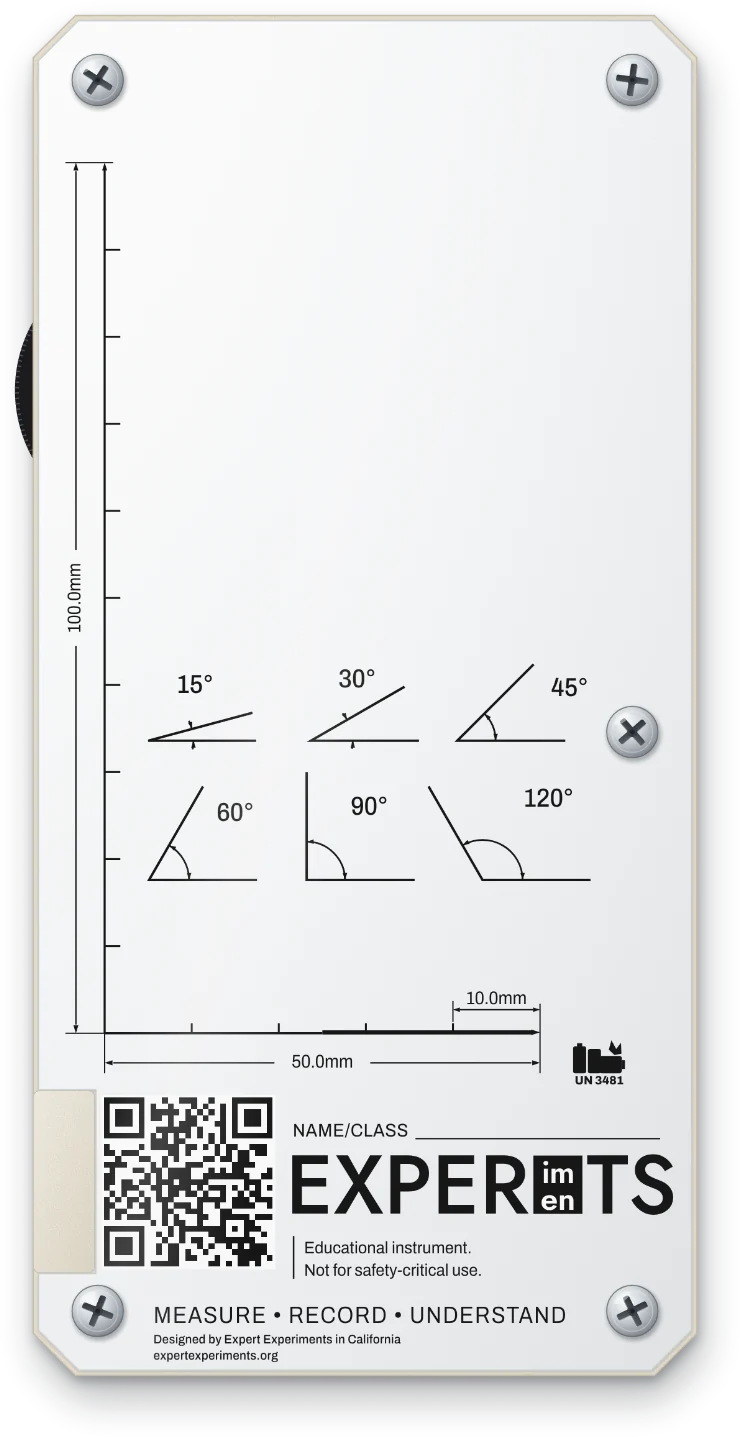
Every part has a job.
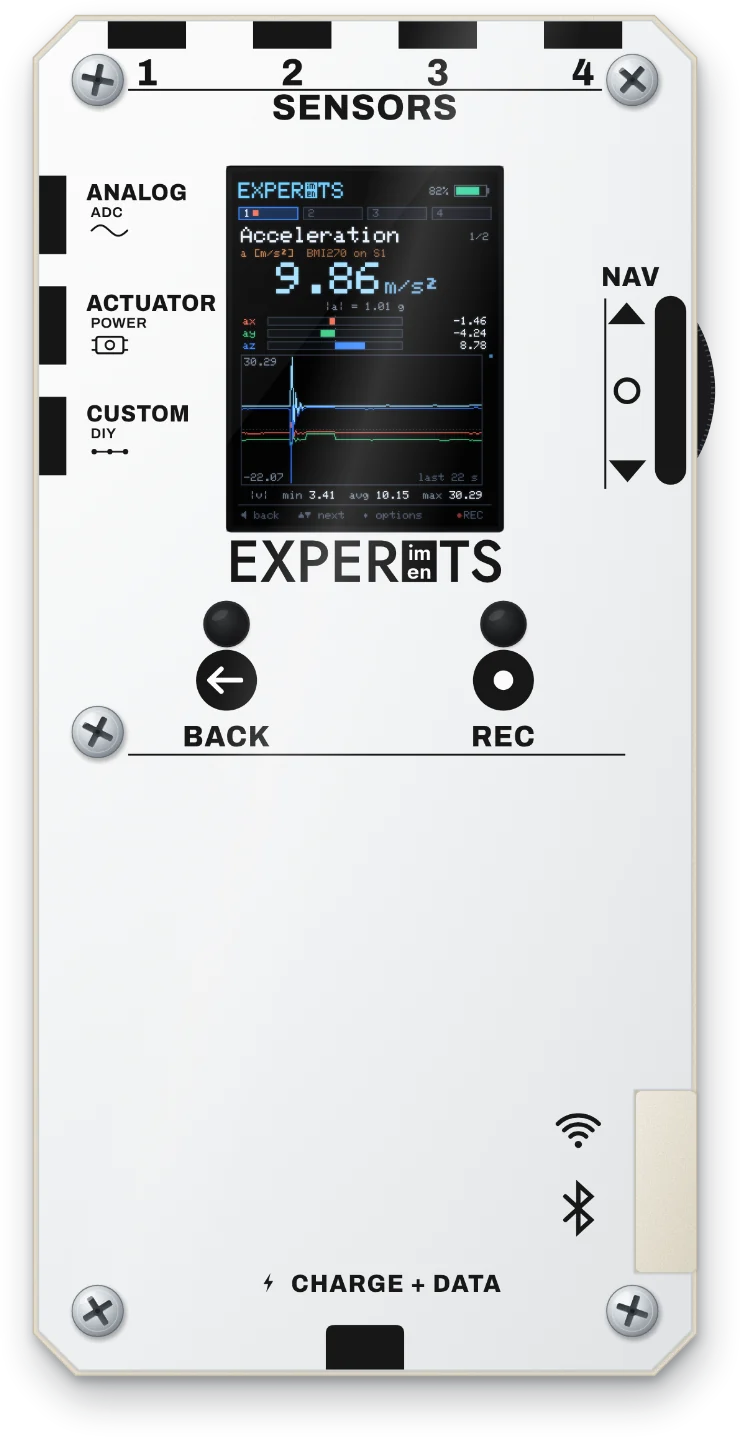
Tap a number to see what it does, then turn the Hepek over.
- Four sensor portsPlug in a pod. The Hepek recognises it.
- Side portsFor the voltage probe, LightLab, force scale and switch.
- Live screenReadings and a graph as you measure. NAV scrolls.
- One-press recordingREC saves data on the spot. No laptop or internet needed.
- USB-C and Wi-FiCharge it, and send your data to the platform.
- Built-in ruler100 mm and 50 mm scales, always to hand.
- Angle guides15° to 120°, for ramps and launch angles.
- Name labelEach student, or group, has their own.
Nine pods. One instrument.
Small modules, one job each. Mix them for the experiment at hand.
-
Motion
Acceleration and rotation
- Port
- S1–S4
- Rate
- 50/s
- Inside
- BMI270
-
Compass
Magnetic field and heading
- Port
- S1–S4
- Rate
- 20/s
- Inside
- MMC5603
-
Weather
Temperature, humidity, pressure and altitude
- Port
- S1–S4
- Rate
- 5/s
- Inside
- BME280
-
Light
Illuminance
- Port
- S1–S4
- Rate
- 5/s
- Inside
- VEML7700
-
Distance
Distance, from 4 cm
- Port
- S1–S4
- Rate
- up to 16.7/s
- Inside
- VL53L1X
-
Voltage probe
Two voltages, 0–29 V DC
- Port
- ANALOG
- Rate
- 50/s
-
LightLab
Light-dependent resistance, with its own LED
- Port
- ANALOG
- Rate
- 50/s
- Inside
- LDR + LED
-
Force scale
Force
- Port
- ANALOG or ACTUATOR
- Rate
- 10/s
- Inside
- HX711
-
Switch
Drives two outputs, 0–100 %
- Port
- ACTUATOR or ANALOG
- Switching
- 1 kHz PWM
- Inside
- 2 MOSFETs
Three ways to the platform.
Pick the one that suits the room.
USB
Chrome or Edge on a computer. The page shows a live preview; the Hepek records, and the file arrives when you stop.
Wi-Fi
The Hepek streams to the platform, which relays it live to every signed-in screen with access: the teacher's laptop and students' phones at once.
REC button
Press REC on the Hepek. No laptop, no internet. Upload the file to the platform later.
See it in an experiment.
Start with First Steps: test three Hepek sensors the way a scientist would.